Import settings and install add-ins on new Outlook for Windows
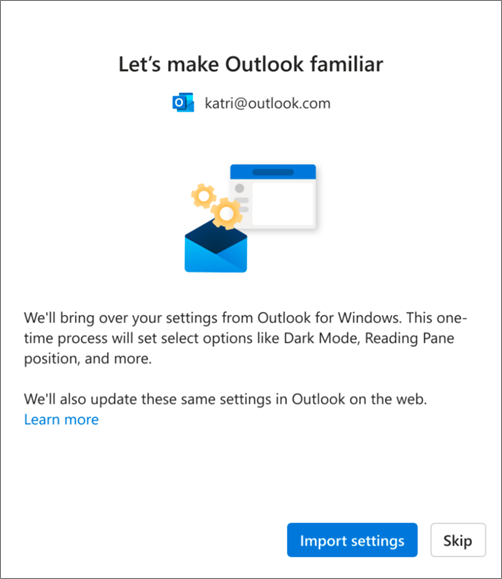
As you start the new Outlook for Windows for the first time, you'll be asked during set up whether you want to import your settings and install your existing Outlook for Windows add-ins, so your new experience feels familiar.
If you toggle into the new Outlook for Windows from classic Outlook for Windows, you'll be prompted to import settings from that app. Otherwise, you'll be given the option to import certain Windows settings. For a list of these imported settings, see List of imported settings from classic Outlook for Windows and List of settings imported from Windows settings.
In addition to your settings, the web add-in counterpart of your existing COM add-ins in classic Outlook for Windows will be installed when you switch to new Outlook for Windows. This way, you can keep using your favorite add-ins without disruptions. For a list of add-ins that will be installed, see List of add-ins installed from classic Outlook for Windows.

Select Import settings or select Skip. Migrating settings takes only a few moments.
If you've never used Outlook for Windows, the default settings will be applied. For a list of settings that are imported, see List of settings imported from Windows settings.
If you're importing a work or school account, when you choose Import settings, your settings will also be applied to Outlook on the web.
Need to try migrating your classic Outlook for Windows settings and add-ins again? Select Settings 
List of imported settings from classic Outlook for Windows
-
Group by Conversations
-
Reading Pane Position
-
Density
-
Message List Preview Text
-
Folder List Expand/Collapse state
-
Message List Width
-
Sender Picture in Message List
-
Attachment Previews
-
Quick Actions on the Message List
-
Dark Mode
-
Header Theme
-
Notification Settings
-
Signatures
-
Auto-Replies
-
Focused/Other
-
Display Language
-
Mark as Read Settings
-
Quick Steps
-
Pinned Calendar or To-Do pane
-
Default Font (Coming Soon)
Calendar
-
Meeting Hours
-
Start/End Meetings Early
-
Every Meeting Online
-
Temperature Format
-
Time Scale
-
Reminder Settings
-
Primary Time Zone
-
Additional Time Zones (Coming Soon)
-
Show Week Numbers (Coming Soon)
-
Date/Time Format (Coming Soon)
-
Week Start Day (Coming Soon)
-
Work Week Days (Coming Soon)
-
Calendar View (e.g. Week, Work Week, Month) (Coming Soon)
List of settings imported from Windows settings
-
Display Language
-
Primary Time Zone
-
Dark Mode
-
More Windows Mail settings are coming soon
List of add-ins installed from classic Outlook for Windows
Important: We're working on rolling out this feature. Periodically check this page for updates on the feature's availability.
When you select the Import Settings option during setup, the web add-in counterparts of your existing COM add-ins in classic Outlook for Windows are installed in the new client. The following table lists the applicable COM add-ins and their web add-in counterparts. By selecting Import Settings, you also consent to the privacy policy, terms of use, and permissions of the respective add-ins. To learn more about the permissions of each add-in, select its link from the "Web add-in to be installed" column.
To check the COM add-ins you currently have installed in classic Outlook for Windows, select File > Options > Add-ins.
|
COM add-in |
Web add-in to be installed |
|---|---|
|
Adobe Acrobat |
|
|
Blue Jeans Outlook Add-in |
|
|
Cisco Webex Meetings |
|
|
Citrix Files for Outlook |
|
|
Evernote |
|
|
harmon.ie |
|
|
Jira |
|
|
Mimecast for Outlook |
|
|
Nitro Pro |
|
|
OnePlaceMail for Outlook |
|
|
RingCentral Meetings Outlook Plugin |
|
|
Zoom Outlook Plugin |
For guidance on how to use and manage the installed web add-ins, see Use add-ins in Outlook.
Note: Your existing web add-ins installed in classic Outlook for Windows remain installed when you switch to new Outlook for Windows.


