

Try it!
Organize flowchart information into functional divisions with swimlanes.
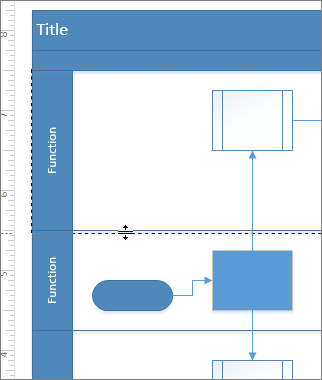
Add swimlanes to a flowchart
-
From the CROSS-FUNCTIONAL FLOWCHART shapes stencil, select More Shapes > Flowchart.
-
Drag a Swimlane shape onto the drawing page.
Drag another swimlane shape near the first one, releasing it when you see the connection indicator.
Change the title of a swimlane
-
Double-click the swimlane label and type a new one in.
Change the size or position of a swimlane
-
To change the width of a swimlane, drag a separator line.
-
To change the length of a swimlane, drag the end line.
-
To move a swimlane and the shapes it contains, select the label and drag the swimlane to another location, and then release it when you see the connection indicator.
-
To delete a swimlane, select it and press Delete.
Want more?


Need more help?
Want more options?
Explore subscription benefits, browse training courses, learn how to secure your device, and more.


Communities help you ask and answer questions, give feedback, and hear from experts with rich knowledge.


