
Color categories in Outlook help you more easily recognize and organize related items. You can apply them to meetings, appointments, emails, notes, contacts, and more.
Once assigned, the color category indication appears within the individual item and also in collective table views (e.g., Inbox). If needed, you can assign multiple color categories to a single item. You can also customize the names and colors of your available color category set.
Important: If you apply a color category to a meeting or request that you've received from another person, the color category selection will not affect their Outlook view. Your category selections will apply only to items within your calendar.
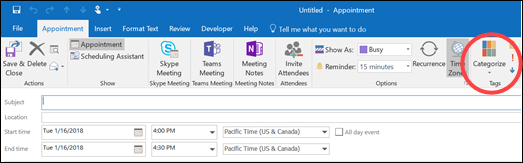
Within an open Outlook item, the category selection list is available in the Categorize section of the ribbon. Select Categorize on the ribbon to open the color category menu.
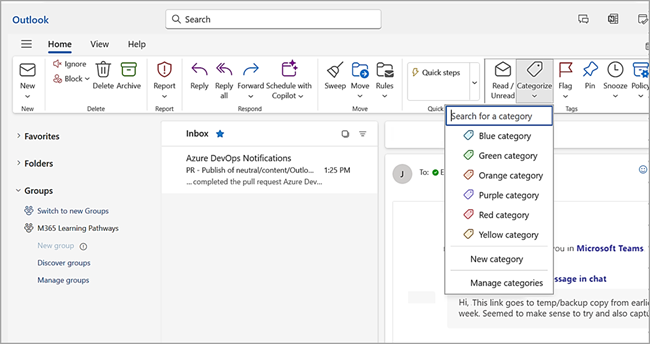
You can select one of the listed categories to apply it to the item. From that menu, you can also proceed to create a New category or to Manage categories that already exist.
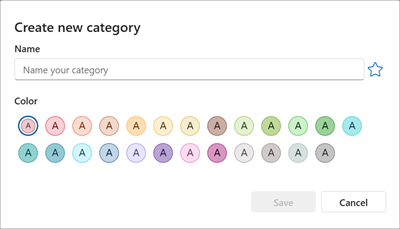
New category
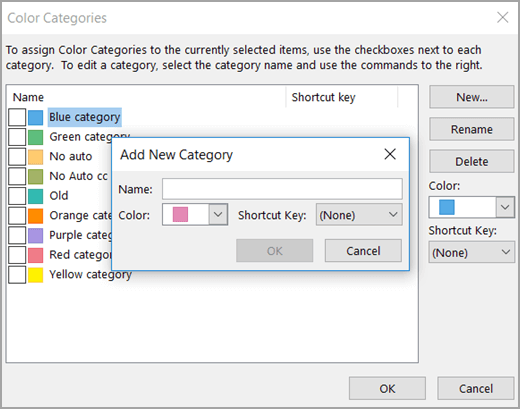
This panel enables you to create category color tags beyond the initially provided set. On this panel, choose a color from the available options and enter a name for your new color category tag. Select Save to commit. It will now appear in the Categorize menu.
Manage categories
Use this panel to make changes as needed.
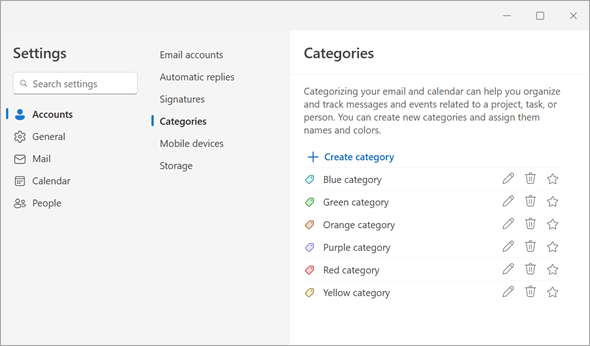
For any displayed category name, select the appropriate icon for any of these actions:
-
Open the edit panel to change name or color
-
Delete the color category
-
Toggle the star/favorite status
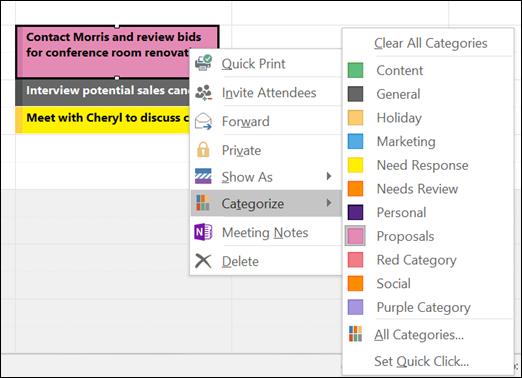
Example of a color-category selection from your list of options.
The same listed categories are available for use on all Outlook item types (e.g., tasks, contacts, messages). If you don't find the category color that you want in the initially displayed list, select All Categories. There you will see others and be able to create and assign new categories. Learn more here.
Assigning color categories
To assign a color category to an appointment, meeting, or event, use one of the following options:
-
From your main calendar view, right-click the appointment, meeting, or event. Then point to Categorize

-
Within an open appointment, meeting, or event, locate the Categorize button
The Color Categories dialog box
To see more categories or to create a new category, select All Categories in the drop-down list. This will open the Color Categories dialog box. To assign a color category select the associate check box. You can also assign multiple categories to a single item.
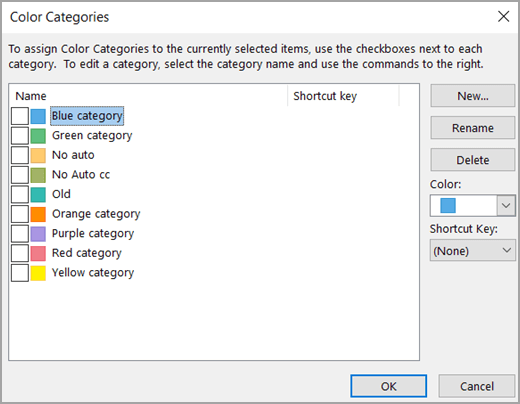
The first time that you assign a default color category to an item, you will be prompted to rename the category. At this time, you can also change the color of the category and assign a keyboard shortcut.
Notes:
-
At any time, you can change the color associated with a category name.
-
You can click Categorize
-
Only the fifteen most recently used color categories appear on the Categorize menu. To see the others, go to the Categorize menu and select All Categories.
Within an open Outlook item, the category selection list is available in the Categorize section of the ribbon. Select Categorize on the ribbon to open the color category menu.
You can select one of the listed categories to apply it to the item. From that menu, you can also proceed to create a New category or to Manage categories that already exist.
New category
This panel enables you to create category color tags beyond the initially provided set. On this panel, choose a color from the available options and enter a name for your new color category tag. Select Save to commit. It will now appear in the Categorize menu.
Manage categories
Use this panel to make changes as needed.
For any displayed category name, select the appropriate icon for any of these actions:
-
Open the edit panel to change name or color
-
Delete the color category
-
Toggle the star/favorite status


